Understanding your thermal images
Already set up your FLIR thermal imaging camera?
Find out what your images mean and how to make the most of them.
Interpret your imagesYou should now be able to see an array of colours on your phone screen. Pointing the camera at areas in your home identifies areas of high heat loss.
- From inside your home: darker, cooler spots show where cool air is coming in.
- From outside your home: reds, whites, yellows, and warmer colours show where heat is escaping.
If your visible image and thermal image are not aligned, you will need to adjust the MSX alignment (multispectral dynamic imaging) to make sure the edges from the visible light camera aligns with the thermal image. Select the MSX alignment icon and slide the marker until the visible edges in your picture align with the thermal patterns.
Getting started
- Make sure the camera is charged (fully charged = LED strips lit up)
- Install the FLIR ONE app from your preferred app store
- Turn the FLIR ONE Edge camera on by holding the On/Off button until the LEDs start flashing, indicating that the camera is booting up. It takes about 20 seconds for the camera to start
- Attach the FLIR ONE edge camera to the back of your mobile device by pulling out the extendable arm until the camera is clamped around the device
- Start the FLIR ONE app on your mobile device
- The FLIR ONE app will guide you to setup permissions from the app and to connect the camera to the mobile device
- To turn off the FLIR ONE edge camera, press and hold the On/Off button until the LEDs turn off.
Understanding your thermal images
This guide shows you how to make the most of the thermal imaging camera.
The thermal images will be more reliable if there is a larger disparity between the indoor temperature and the outdoor temperature e.g. heating on when it’s cold outside.
Understanding the colours
Warm areas are identified by orange, yellow and white colours. The brighter the colours, the warmer the area.
Dark areas are represented by dark blue and purple hues. The darker the blue, the colder the area. These are the areas where heat is escaping and you may be able to insulate in order to save energy.
Windows
Point the FLIR camera at the windows in your home.
If you have single-glazed windows, the thermal images will likely show the panes to be much darker than the surrounding walls as heat is lost around twice as fast through single-glazed windows than through double-glazed windows.
Improving heat loss from single-glazed windows
- To keep heat inside the house, you could consider investing in an upgrade to double or triple-glazed windows.
- Alternatively, a cheaper option is to fit a secondary pane of glass inside the existing window reveal (either a permanent uPVC panel fitted behind the existing single-glazed window which requires a professional to install, or a more temporary solution using magnetic seals to attach the supplementary panel to your existing windows). This won’t result in a well-sealed double-glazing unit, but will be much cheaper to fit and ultimately will still save energy.
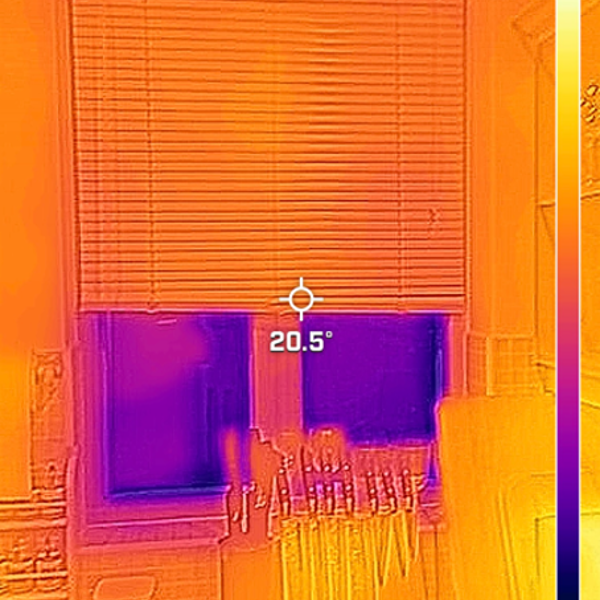
Improving heat loss from double-glazed windows
If you have double-glazed or even triple-glazed windows, the thermal images will likely still show the panes to be darker than the surrounding walls, but not as dark as single-glazed. To investigate double-glazed windows for areas of heat loss, you should look at the thermal image around the corner of the windows to check the stripping/sealing. When it gets cold outside, stripping materials tend to shrink and result in heat loss from the corner of windows and doors.
This image shows the benefit of blinds when trying to keep heat within the home.
Improving heat loss from double-glazed windows
- If you see darker areas of heat loss around the corner of your windows you can use self-adhesive draught-proofing strips as for the doors to fill the gap between the window and the frame to seal the area and reduce heat loss.
- Silicone sealant can be used to fill the gap between the window and the frame.
- Keep curtains and blinds open when the sun is shining to let in the free heat from the sun and make sure to close the curtains/blinds to keep the heat in when the sun sets.
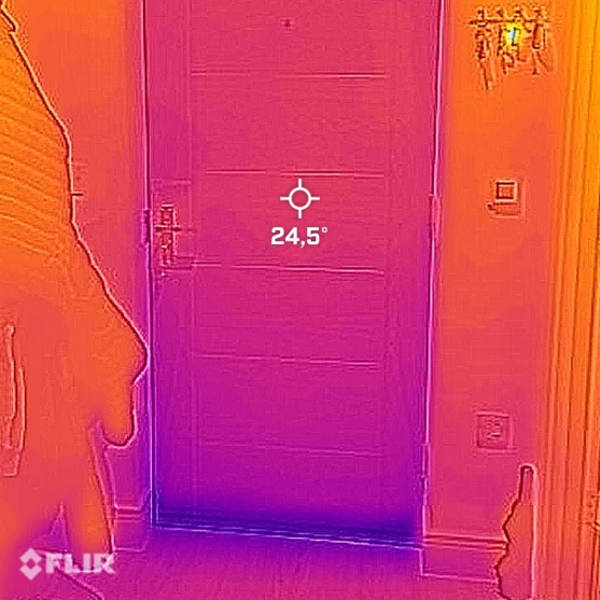
Doors
These two images show a draughty door and a well-insulated door. The door on the left is draughty and losing heat, as shown by the dark blue areas around the door. The image on the right shows the same door but where a draught excluder has been attached at the base of the door (in this case we used a rolled up towel), the lighter colours show that the draught is being blocked and the area is now warmer.
Improving heat loss from doors
- To recreate the above solution at home and reduce draughts from the bottom of the door, you could purchase a cushion draught excluder from a DIY store.
- For a more permanent solution for the bottom of the door you could install a brush strip draught excluder.
- For heat loss from around the sides and tops of the doors, you can fill the gaps between the door and the door frame using self-adhesive draught proofing strips.
- For heat loss around the letter box, use a letterbox flap or brush – make sure you measure the letter box first to ensure you get the right size.
- If the keyhole is draughty, you can get a cover (metal disc over the keyhole) to block heat loss.
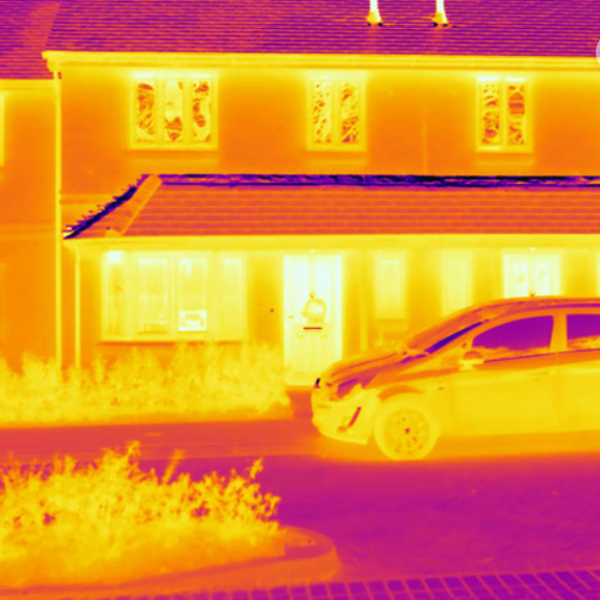
Loft
To assess heat loss from the loft, it’s best to look at your home from the outside.
As you're looking from the outside, lighter colours showing a warmer temperature leaking from inside the house should be looked for.
Patches of colour lighter than the surrounding house could be showing a gap in the loft insulation or a lighter colour across the roof of the house could be showing that loft insulation is lacking.
This image shows that this property has significant losses just below the roof edges. This commonly occurs where loft or ceiling insulation (if any) has not been packed right to the edges, so heat will escape at the top of the walls. The image also shows losses from the front door, the door could be wooden or poorly insulated or of insufficient thickness.
Improving heat loss from the loft/roof of your house
- If your loft is easy to access, does not have damp problems and is not a flat roof, you could probably insulate it yourself. You can use rolls of mineral wool insulation bought from DIY and hardware stores.
- If you have damp problems or a more complex insulation is needed, a professional installer should be used.
Extractor fans
Make sure to turn off your extractor fan when you’ve finished using it, or get a timed extractor fan as these can let a lot of cold air into your home (insert image if we can).
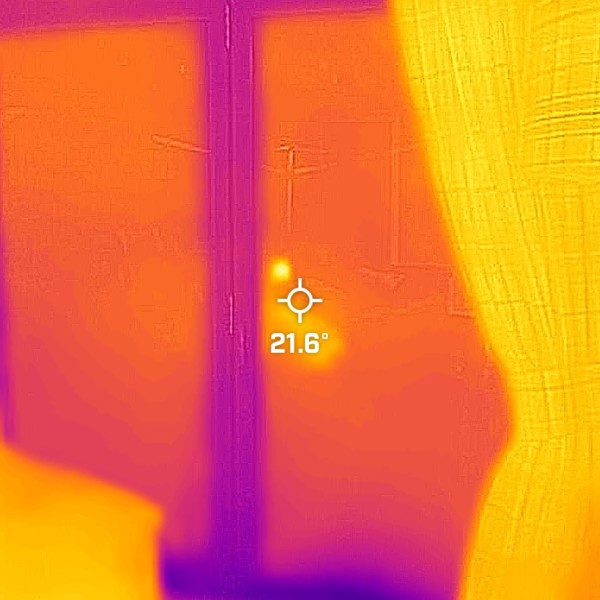
Check for missing insulation
Thermal imaging equipment is good at detecting places of missing insulation or insulation that has moved in a home, including the ceiling and the walls, or a now hidden wall or cavity.
In the images to the right, the darker window-shaped area on the thermal imaging shows a cooler area; heat loss is occurring from this area.
These can be a tricker fix as it is in the middle of the wall/roof, but this kind of problem could be solved with external wall insulation or cavity wall insulation (if part of a renovation etc).
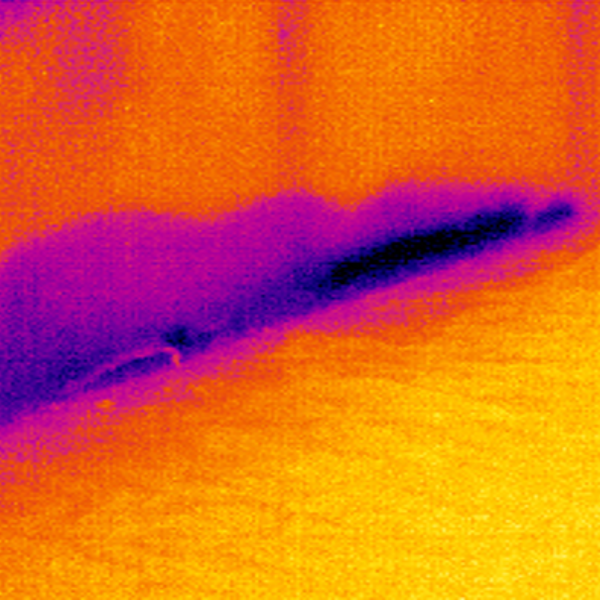
Water damage/leaks
Areas of the home such as bathrooms, kitchens, laundry rooms, basements and lofts are all exposed to moisture and susceptible to water leaks. This can lead to mould and create buildups that shift insulation and create higher energy bills.
The FLIR camera can detect temperature differences created by this moisture.
To start checking, turn your heating on and allow the walls to warm up a bit. Any water present will warm more slowly than dry walls, so this will show up clearly through the camera.
Water damage from the floor tends to be along the bottom edge of the wall and gradually creeps up it. The second shape to look out for is a downward triangle, heaviest at the top and thins out as it travel downward or across a ceiling.
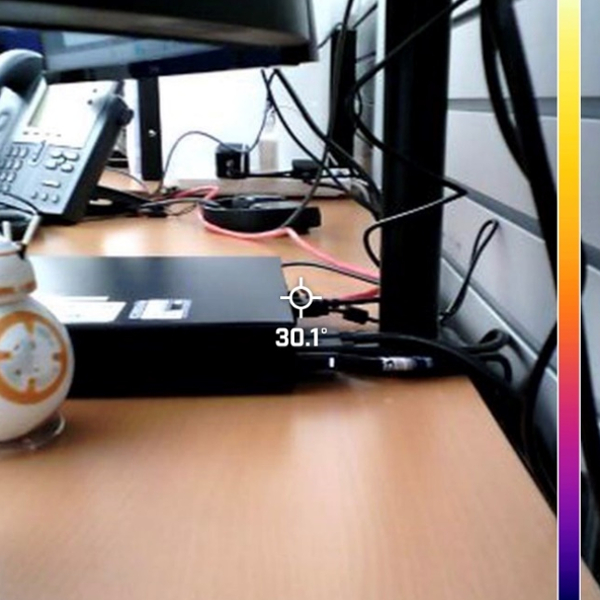
Cable and energy management
Thermal imaging lets you check your outlet’s temperature to see if it’s running too hot, and you can also check which electronics are continuing to pull from the outlet when they are powered off.
Further information
You can find further advice from the experts at FLIR on their website.
Imagery supplied by FLIR.
Speak to Customer Care
If you have any questions or need further support, choose an option below to speak to our Customer Care team.